Complete Beginner’s Guide to Setup Android Pentest Lab without Physical Device
Are you interested in exploring the field of Android penetration testing but lacking on physical device? This guide will explain how to set up an Android pentesting lab using an emulator, eliminating the need for a physical device.
The method I’ll use for this guide relies on the Android Virtual Device (AVD) from Android Studio. AVD support Mac computers with ARM processors, making it a perfect choice for this specific approach. Download Android Studio from official website and choose mac apple chip if you are using ARM chip, like I did.


Install and setup Android Studio
Follow the wizard to install android studio

Choose standard install


Wait until android studio setup wizard finished

Click Virtual Device Manager to open up AVD manager

Click Create device and customized it as you need. If you need google play service, choose device with play store flag and system image that include Google Play API support.


Choose system image that you want, in this case I used API 34(Android 14). Feel free to adjust as your need.


If the previous process is done and succeed, start the AVD and wait until android is ready to use.


Check the adbconnection between your mac and android vm to make sure that adb is connected/attached

WARNING: Before rooting the device, you need to disable snapshot for cold boot. If you forgot to disable the snapshot feature, the device will be going back to default state before rooting and all data after android rooted will gone.

For rooting our Android, we will use rootAVD from https://gitlab.com/newbit/rootAVD. We need to git clone first.
❯ git clone https://gitlab.com/newbit/rootAVD && cd rootAVD
Cloning into 'rootAVD'...
remote: Enumerating objects: 501, done.
remote: Counting objects: 100% (175/175), done.
remote: Compressing objects: 100% (90/90), done.
remote: Total 501 (delta 126), reused 126 (delta 83), pack-reused 326
Receiving objects: 100% (501/501), 65.95 MiB | 7.21 MiB/s, done.
Resolving deltas: 100% (302/302), done.
Running the tool without argument will give us help message
❯ ./rootAVD.sh
rootAVD A Script to root AVD by NewBit XDA

Usage: rootAVD [DIR/ramdisk.img] [OPTIONS] | [EXTRA ARGUMENTS]
or: rootAVD [ARGUMENTS]

Arguments:
 ListAllAVDs   Lists Command Examples for ALL installed AVDs

 InstallApps   Just install all APKs placed in the Apps folder

Main operation mode:
 DIR    a path to an AVD system-image
     - must always be the 1st Argument after rootAVD


-------------------------------SNIP-------------------------------
For the first step, we need to run rootAvd.sh ListAllAVDs to know the available commands to run in command example section as shown below
❯ ./rootAVD.sh ListAllAVDs
rootAVD A Script to root AVD by NewBit XDA

Usage: rootAVD [DIR/ramdisk.img] [OPTIONS] | [EXTRA ARGUMENTS]
or: rootAVD [ARGUMENTS]

Arguments:
 ListAllAVDs   Lists Command Examples for ALL installed AVDs

 InstallApps   Just install all APKs placed in the Apps folder

----------------------------SNIP-----------------------------

Extra Commands can be combined, there is no particular order.

Notes: rootAVD will
- always create .backup files of ramdisk.img and kernel-ranchu
- replace both when done patching
- show a Menu, to choose the Magisk Version (Stable || Canary || Alpha), if the AVD is online
- make the choosen Magisk Version to its local
- install all APKs placed in the Apps folder
- use ~/Library/Android/sdk to search for AVD system images

Command Examples:
./rootAVD.sh
./rootAVD.sh ListAllAVDs
./rootAVD.sh InstallApps

./rootAVD.sh system-images/android-34/google_apis/arm64-v8a/ramdisk.img
./rootAVD.sh system-images/android-34/google_apis/arm64-v8a/ramdisk.img FAKEBOOTIMG
./rootAVD.sh system-images/android-34/google_apis/arm64-v8a/ramdisk.img DEBUG PATCHFSTAB GetUSBHPmodZ
./rootAVD.sh system-images/android-34/google_apis/arm64-v8a/ramdisk.img restore
./rootAVD.sh system-images/android-34/google_apis/arm64-v8a/ramdisk.img InstallKernelModules
./rootAVD.sh system-images/android-34/google_apis/arm64-v8a/ramdisk.img InstallPrebuiltKernelModules
./rootAVD.sh system-images/android-34/google_apis/arm64-v8a/ramdisk.img InstallPrebuiltKernelModules GetUSBHPmodZ PATCHFSTAB DEBUG
./rootAVD.sh system-images/android-34/google_apis/arm64-v8a/ramdisk.img AddRCscripts
As shown in the above output, there’s available system-image at system-images/android-34/google_apis/arm64-v8a/ramdisk.img. For rooting the device, we can use this command ./rootAVD.sh system-images/android-34/google_apis/arm64-v8a/ramdisk.img


As shown in the above picture that Installed status is N/A that means magisk is fail to installed. For the android 34, we unable to use the common method for rooting the device. But, instead we need to use FAKEBOOTIMG method.
❯ ./rootAVD.sh system-images/android-34/google_apis/arm64-v8a/ramdisk.img FAKEBOOTIMG
[!] and we are NOT in an emulator shell
[*] Set Directorys
[-] source.properties file exist
[*] AVD system-image Pkg.Revision=7
[-] Test if ADB SHELL is working
[*] ADB connection possible
[-] In any AVD via ADB, you can execute code without root in /data/data/com.android.shell
[*] Cleaning up the ADB working space
[*] Creating the ADB working space
[-] Magisk installer Zip exists already
[*] Push Magisk.zip into /data/data/com.android.shell/Magisk
[-] ./Magisk.zip: 1 file pushed, 0 skipped. 204.4 MB/s (11411692 bytes in 0.053s)
[-] ramdisk.img Backup exists already
[*] Push ramdisk.img into /data/data/com.android.shell/Magisk/ramdisk.img
[-] /Users/user/Library/Android/sdk/system-images/android-34/google_apis/arm64-v8a/ramdisk.img: 1 file push

---------------------------------SNIP---------------------------
Script will ask you for the right magisk version to be installed, choose the version that suitable for you. For me, it’s stable version.
[!] AVD is online
[!] Checking available Magisk Versions
[?] Choose a Magisk Version to install and make it local
[s] (s)how all available Magisk Versions
[1] local stable '26.1' (ENTER)
[2] stable 26.1
[3] canary d390ca2f(26104)
[4] alpha 46770db1-alpha(26103)
2 <--- type 2 and enter
[-] You choose Magisk stable Version 26.1
[*] Deleting local Magisk '26.1'
[*] Downloading Magisk stable 26.1
[!] Downloading Magisk stable 26.1 complete!
[-] Switch to the location of the script file
[*] Looking for an unzip binary
[-] unzip binary found
Then, the script will ask you to patch the generated img at /sdcard/Download/fakeboot.img manually
[*] After decompressing ramdisk.img, magiskboot will work
Detected format: [lz4_legacy]
[*] Processing fake Boot.img
[*] Creating a fake Boot.img
[-] removing old /sdcard/Download/fakeboot.img
[!] Only a minimal header is required for Magisk to repack the ramdisk
[*] repacking ramdisk.img into /sdcard/Download/fakeboot.img
[*] Searching for pre installed Magisk Apps
[!] Found a pre installed Magisk App, use it
[*] Detecting current user
[-] Current user 0
[-] Starting Magisk
[*] Install/Patch /sdcard/Download/fakeboot.img and hit Enter when done(max. 60s)
Patch the img with this following step


After patching the image, don’t forget to hit the Enter as mentioned in the script before. After that the script will automatically restart the device whenever the script is finished. As shown below, Magisk v26.1 is successfully installed.
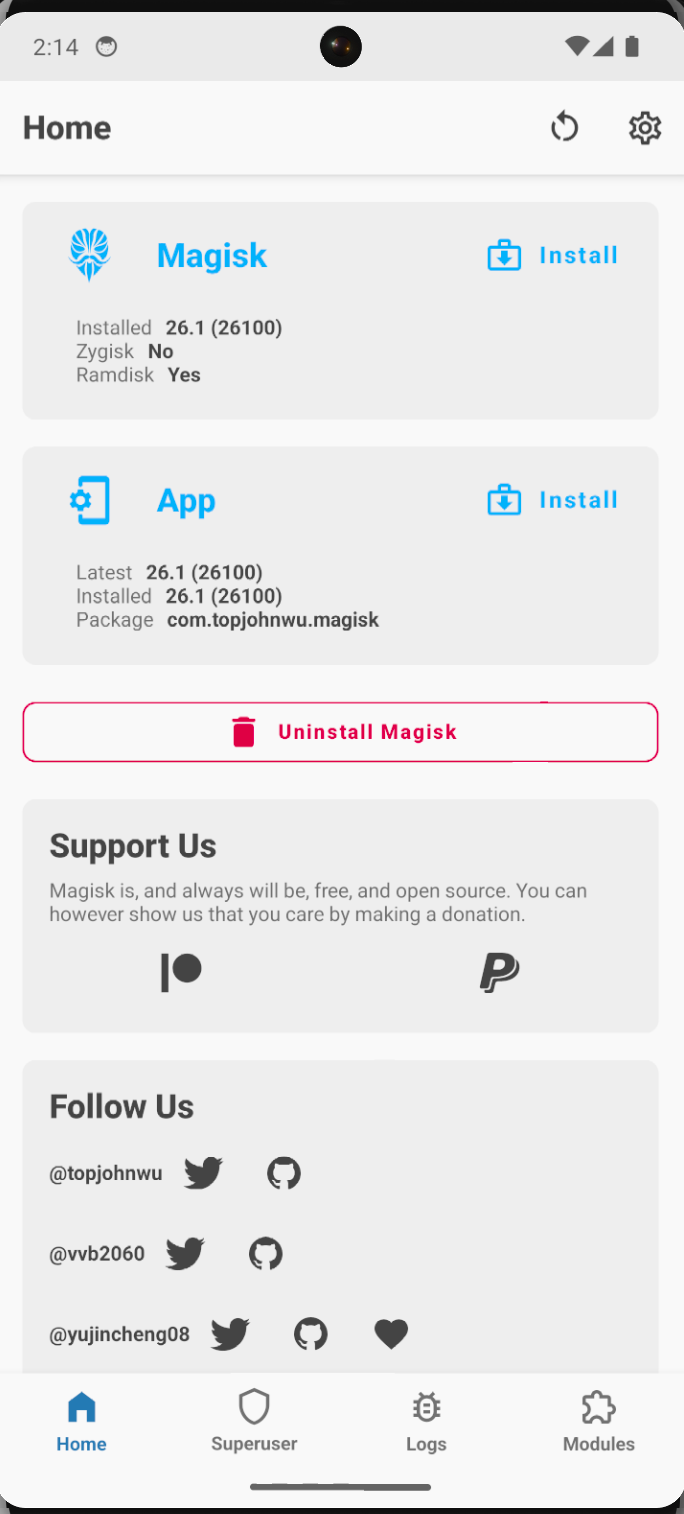
Don’t forget to enable Zygisk if you want to use root bypass feature in setting and then restart the device


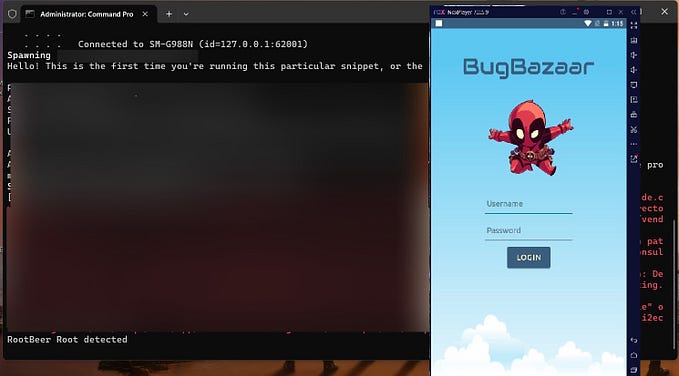
Now you are already rooted the virtual device with magisk and if you want to bypass root detection in the target app, just add the target app name in the Configure Denylist
Setting Burp Suite for Proxy Server
After we rooted the device, we will setup burp suite as proxy. So we able to modify the request before app send to the server.

We need to export CA and Cert from Burpsuite, so android device able to trust the certificate when visiting website via our proxy.


After we success exporting burp CA Certificate, we need to transfer the file to the android device by using adb command
❯ adb push burpca.der /sdcard/Download/
burpca.der: 1 file pushed, 0 skipped. 1.7 MB/s (940 bytes in 0.001s)
Then we will need to install the CA certificate in this setting menu
Go to Android Settings -> Security & Privacy -> More Security & Privacy -> Encryption & Credentials -> Install a certificate -> Choose CA Certificate.
Click Install Anyway and choose the previous pushed certificate in the /sdcard/Download.
Setting Proxy in Android
There are many methods to modify the proxy in android:
- Modify proxy via Android Wifi setting GUI
Go to Wifi Settings and then edit the wifi connection. Click Advance option and change the Proxy to manual and enter the burp ip and port

- Modify proxy via adb
To enable proxy using adb, we can use this command
❯ adb shell settings put global http_proxy IP_PROXY:PORTAnd to disable the proxy, we can use this command
❯ adb shell settings put global http_proxy :0- Modify proxy via emulator settings
To setting the proxy in emulator, you can launch the emulator and then click Settings -> Proxy. Then uncheck “Use Android Studio HTTP Proxy Settings” like the image below

- Modify proxy via third party app
There are many third party app, such as:
- proxydroid(https://play.google.com/store/apps/details?id=org.proxydroid)
- Proxy-toggle https://github.com/theappbusiness/android-proxy-toggle
After that, try to visit google.com and it will show you that connection is secure with green lock in the browser.

Installing frida
For more information about Frida, you can read at https://frida.re/
I’m using virtualenv in MacOS, feel free to adjust it with your environment. Install frida-tools from pip
❯ pip -V
pip 23.0.1 from /nix/store/v0a077jw3gvdysh8m9l07a9khxnzgmll-python3-3.10.12-env/lib/python3.10/site-packages/pip (python 3.10)
❯ python -V
Python 3.10.12
❯ pip install frida frida-tools
Collecting frida
  Obtaining dependency information for frida from https://files.pythonhosted.org/packages/85/be/1bbab04ad6b7c93d2c996b329f6d55322889abf48ddd154357ce5f954309/frida-16.1.3-cp37-abi3-macosx_11_0_arm64.whl.metadata
  Downloading frida-16.1.3-cp37-abi3-macosx_11_0_arm64.whl.metadata (2.0 kB)
Collecting frida-tools
  Using cached frida_tools-12.2.1-py3-none-any.whl
Requirement already satisfied: typing-extensions in ./.venv/lib/python3.10/site-packages (from frida) (4.7.1)
Requirement already satisfied: colorama<1.0.0,>=0.2.7 in ./.venv/lib/python3.10/site-packages (from frida-tools) (0.4.6)
Requirement already satisfied: prompt-toolkit<4.0.0,>=2.0.0 in ./.venv/lib/python3.10/site-packages (from frida-tools) (3.0.38)
Requirement already satisfied: pygments<3.0.0,>=2.0.2 in ./.venv/lib/python3.10/site-packages (from frida-tools) (2.15.1)
Requirement already satisfied: wcwidth in ./.venv/lib/python3.10/site-packages (from prompt-toolkit<4.0.0,>=2.0.0->frida-tools) (0.2.6)
Using cached frida-16.1.3-cp37-abi3-macosx_11_0_arm64.whl (30.5 MB)
Installing collected packages: frida, frida-tools
Successfully installed frida-16.1.3 frida-tools-12.2.1
After we’ve successfully installed frida-16.1.3 and frida-tools-12.2.0, for frida to work in our android/ios we need to setup the frida-server.
Setup frida-server in Android
Go to https://github.com/frida/frida/releases and choose the frida-server-version-android-arm.xz, change the version with your installed frida version like I bold above. Frida client and server must have the same version.
Download the frida to host machine
❯ wget https://github.com/frida/frida/releases/download/16.1.3/frida-server-16.1.3-android-arm64.xzLength: 6824388 (6.5M) [application/octet-stream]
Saving to: ‘frida-server-16.1.3-android-arm64.xz’frida-server-15.2.2-andr 100%[==================================>] 6.51M 6.88MB/s in 0.9s2022-08-08 18:01:59 (6.88 MB/s) - ‘frida-server-16.1.3-android-arm64.xz’ saved [6824388/6824388]Extract xz file
❯ xz -d frida-server-16.1.3-android-arm64.xz
❯ ls | grep frida
frida-server-16.1.3-android-arm64
❯ mv frida-server-16.1.3-android-arm64 frida-server
After downloading, rename the file to frida-server, the next step is to copy the file to android. In my case, I copy the file to /data/local/tmp/
❯ adb push frida-server /data/local/tmp
frida-server: 1 file pushed, 0 skipped. 23.1 MB/s (19972988 bytes in 0.824s)
Run the frida-server
❯ adb shell
emu64a:/ $ su
emu64a:/ # cd /data/local/tmp/
emu64a:/data/local/tmp # chmod +x frida-server
emu64a:/data/local/tmp # ./frida-server &
To check if frida-server is sucessfully running, we can use commandps and grep
1|emu64a:/data/local/tmp # ps | grep frida
root         23299 23280   39280  19640 poll_schedule_timeout f10486e0 S frida-server
We’ve done with setuping frida in android.
For now, we are already reaching the end section of thisarticle. Good luck on pentesting android \m/
![Easy Way to Bypass SSL Pinning with Objection & Frida [Beginner Friendly]](https://miro.medium.com/v2/resize:fit:679/1*EZIirlNhBlcqbVJVq-H9Mg.png)